Once you connect your Wise account to Xero and enable the bills feature, you can import your bills directly to Wise. You can also view your unpaid bills in real-time on your Wise account and pay them directly from your Bills page.
Learn how to connect your Wise account with Xero
How to import bills to Wise
Log into your Wise account
Select your business name in the top corner
Go to Connect and Manage apps under Settings
Choose Connected, then choose Manage next to the Xero logo.
Scroll down to Bills and toggle it right to turn it on.
Please note that Wise won't import any bills you mark as paid in Xero. If you paid a bill through another provider and marked it as paid in Xero, it won't appear on your Bills page in Wise.
Marking bills as paid in Xero
On the Connection settings page you’ll also see an option to mark bills as paid in Xero. If you enable this, when you pay a bill through your Bills page on Wise, we’ll automatically mark it as paid in Xero. Fees will be recorded as Bank Charges.
Paying unpaid bills
Navigate to the Bills tab in your Wise account.
If your bills are already synced, you'll see a list of unpaid bills from Xero. These will be synced automatically.
From the Bills tab, you can pay the bill as you would normally send money through Wise.
Examples for bill payment
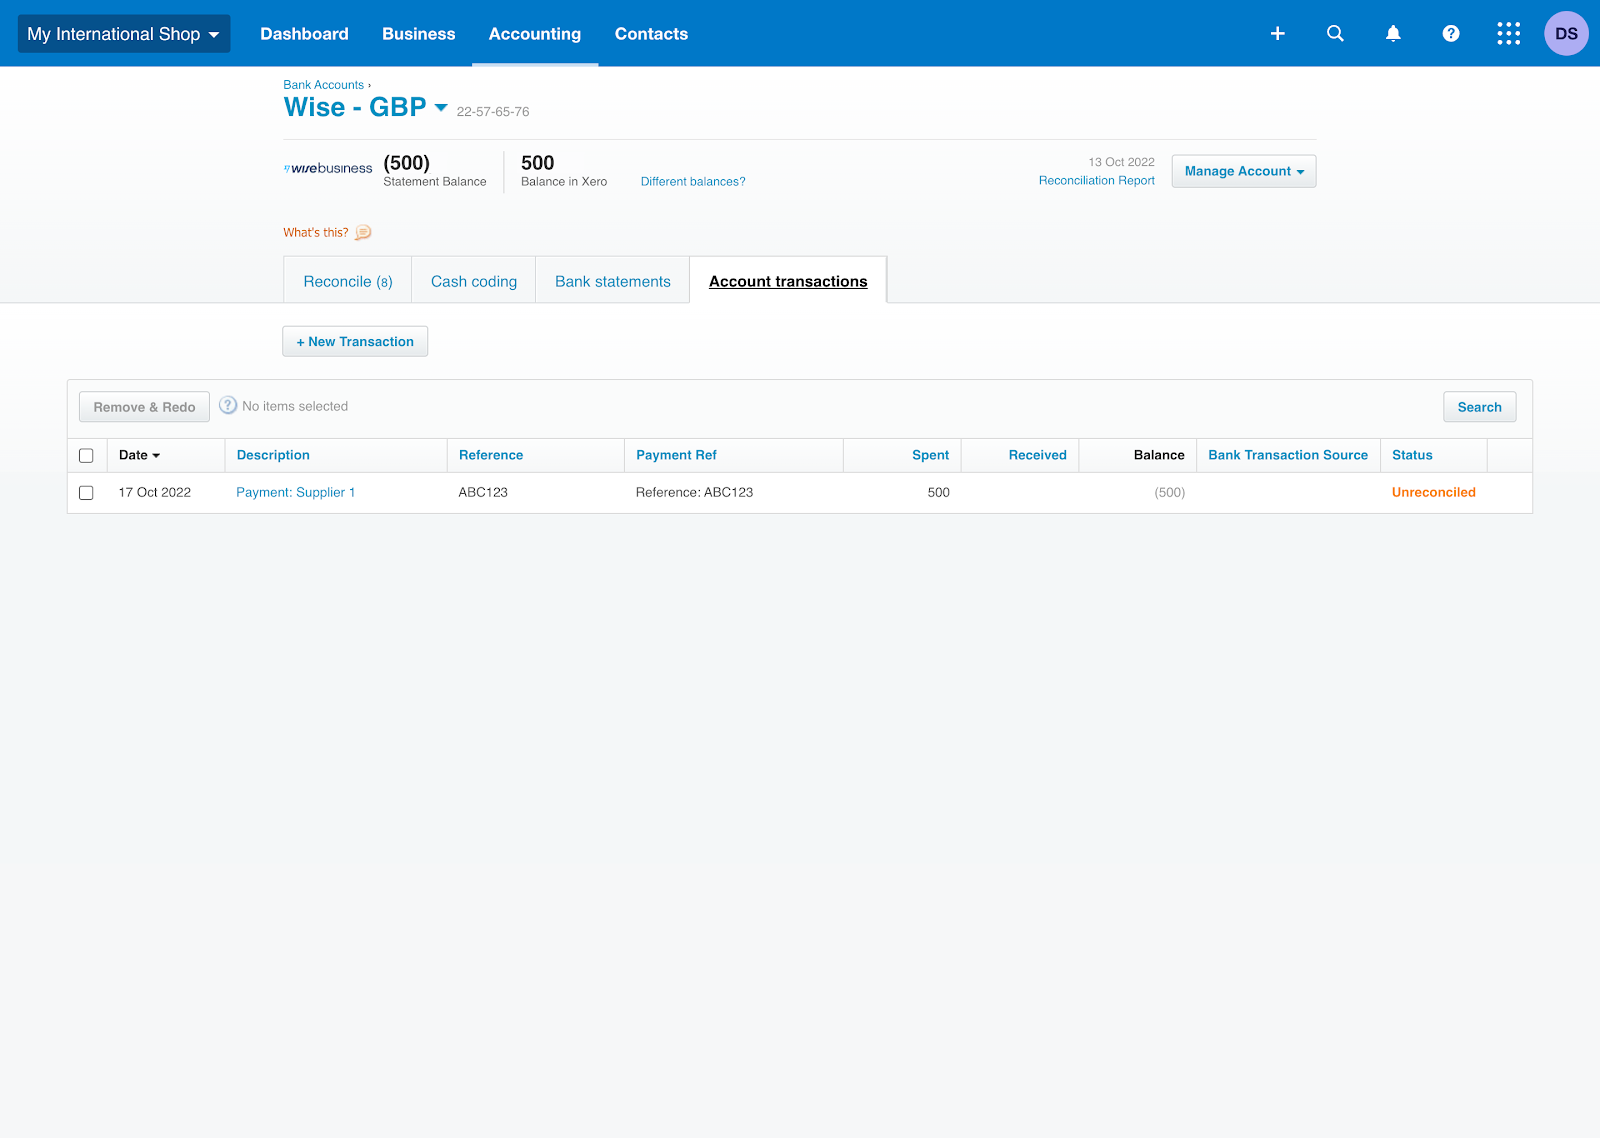
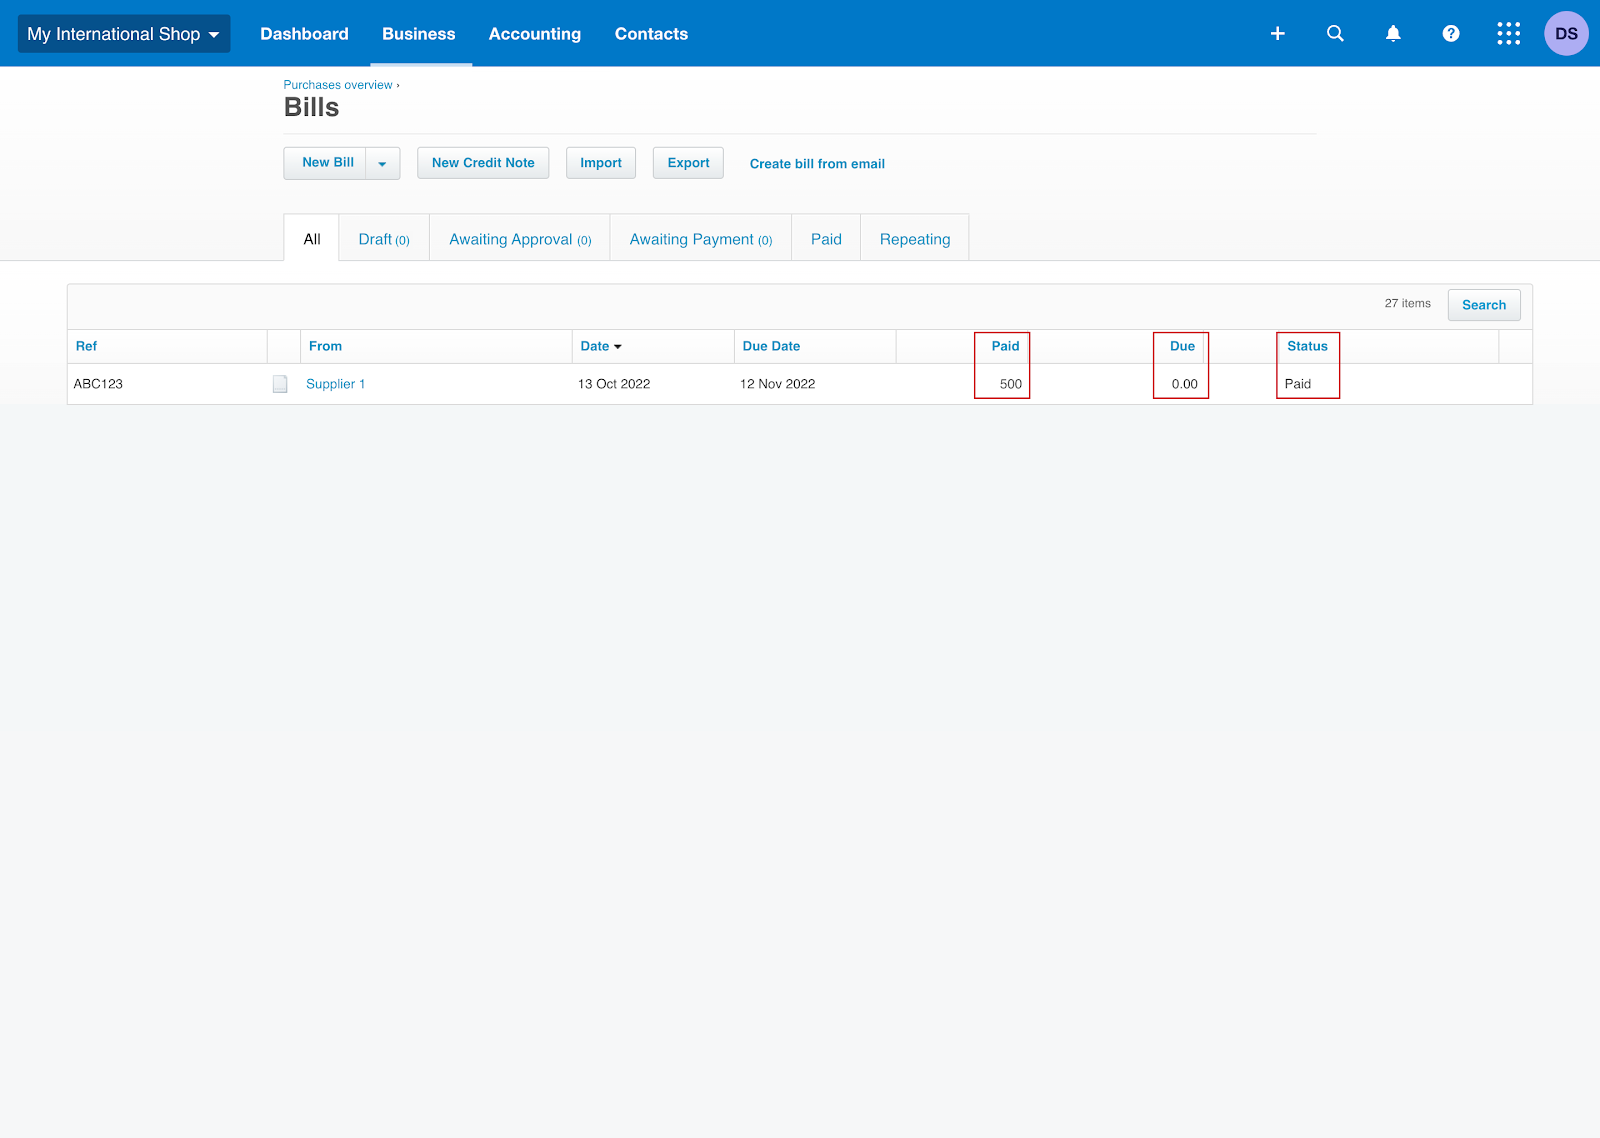
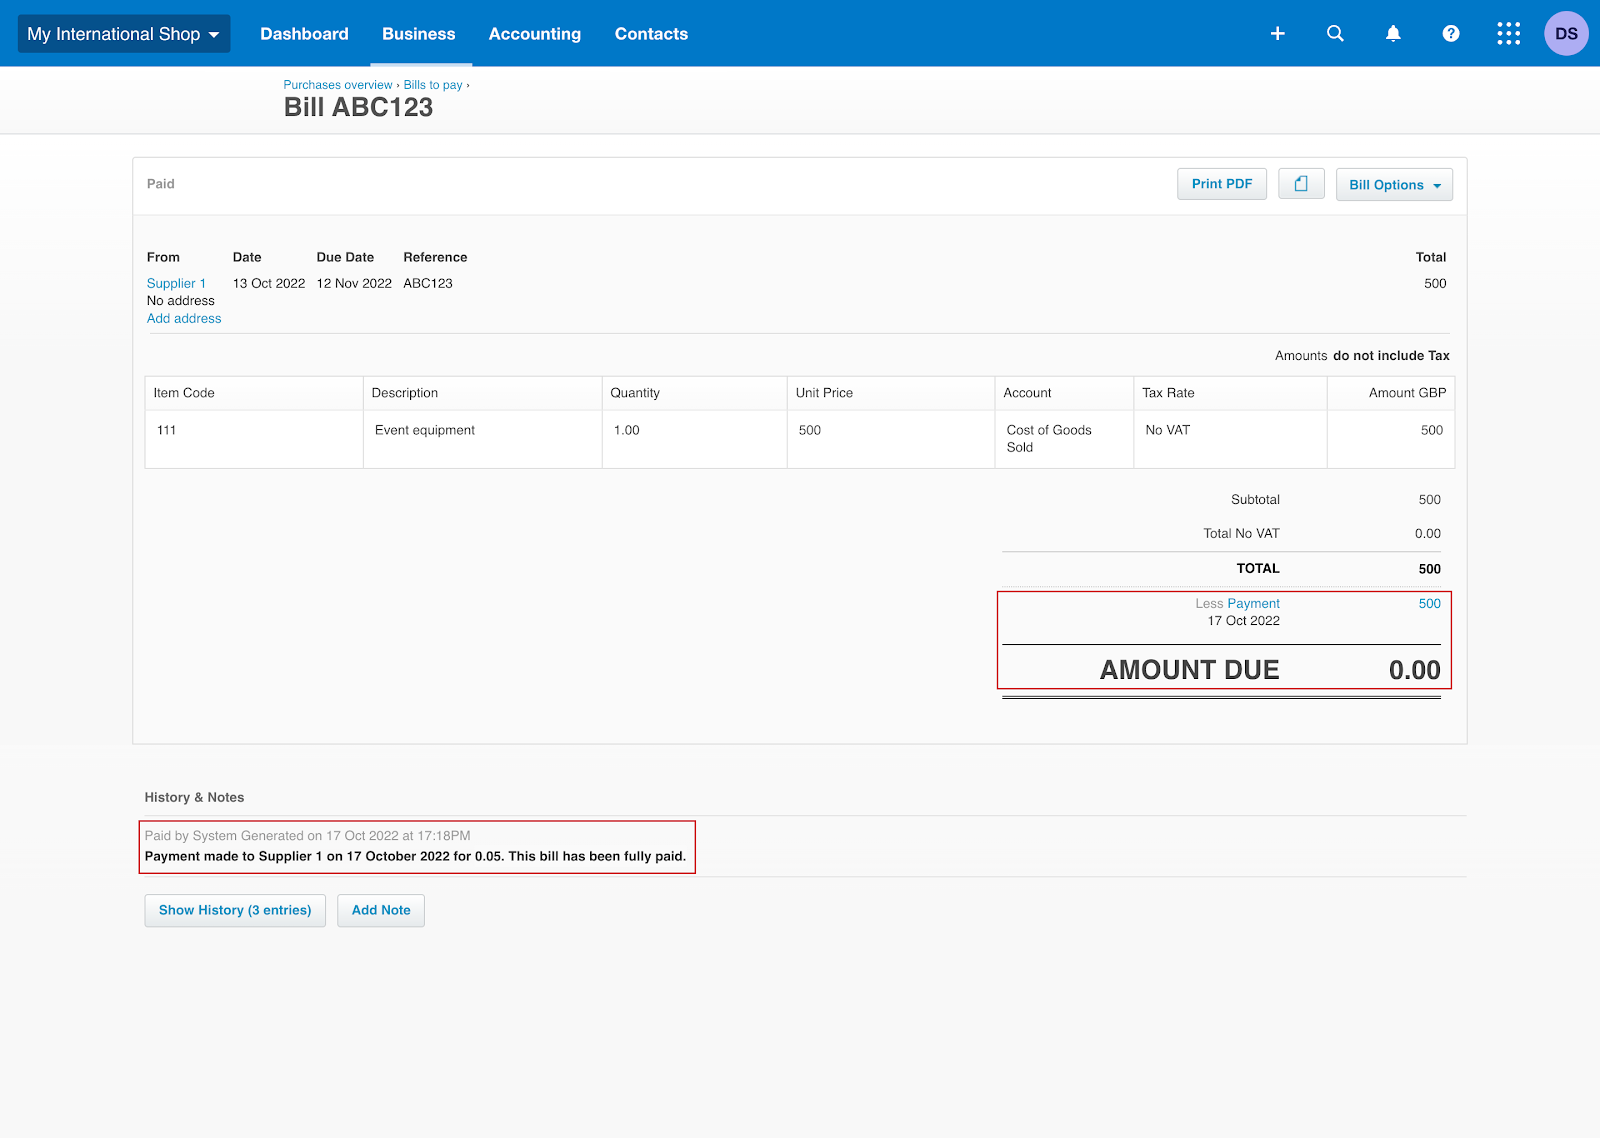
Let's say you used the Bill pay feature on Wise to pay your bill ABC123 in the amount of £500. It's been paid to ‘Supplier 1’ and you funded the bill from your Wise GBP currency.
Because you connected your Wise GBP currency to your Xero bank account named ‘Wise - GBP’, the bill payment transaction will be recorded in that account, and we'll mark your ‘ABC123’ bill as paid.
Why is there a new clearing account added?
We’ll automatically create these clearing accounts in your Chart of Accounts for the following reasons:
Expenses (Wise):
If you choose an external payment method, we’re not always able to retrieve information about the bank account that is funding a payment, for example a non-Wise card payment or bank payment. If this occurs, the unidentified transaction will be recorded in ‘Expenses (Wise)’.
Cross currency clearing account (Wise):
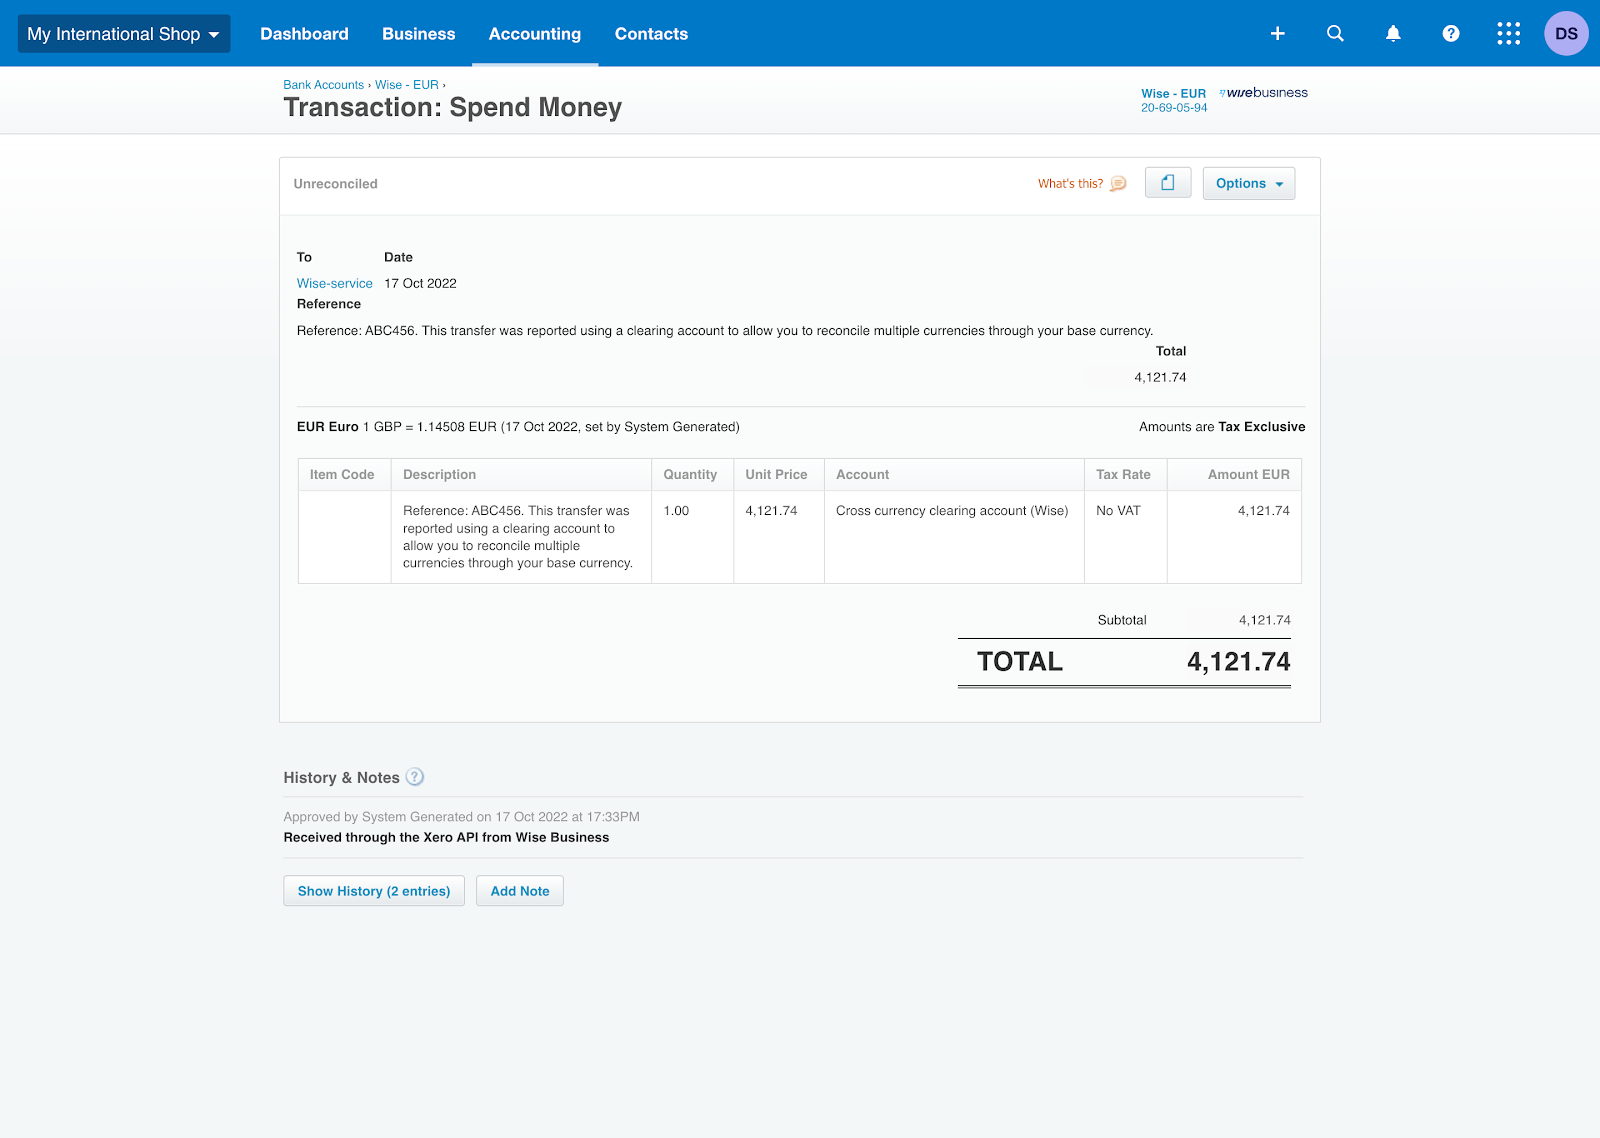
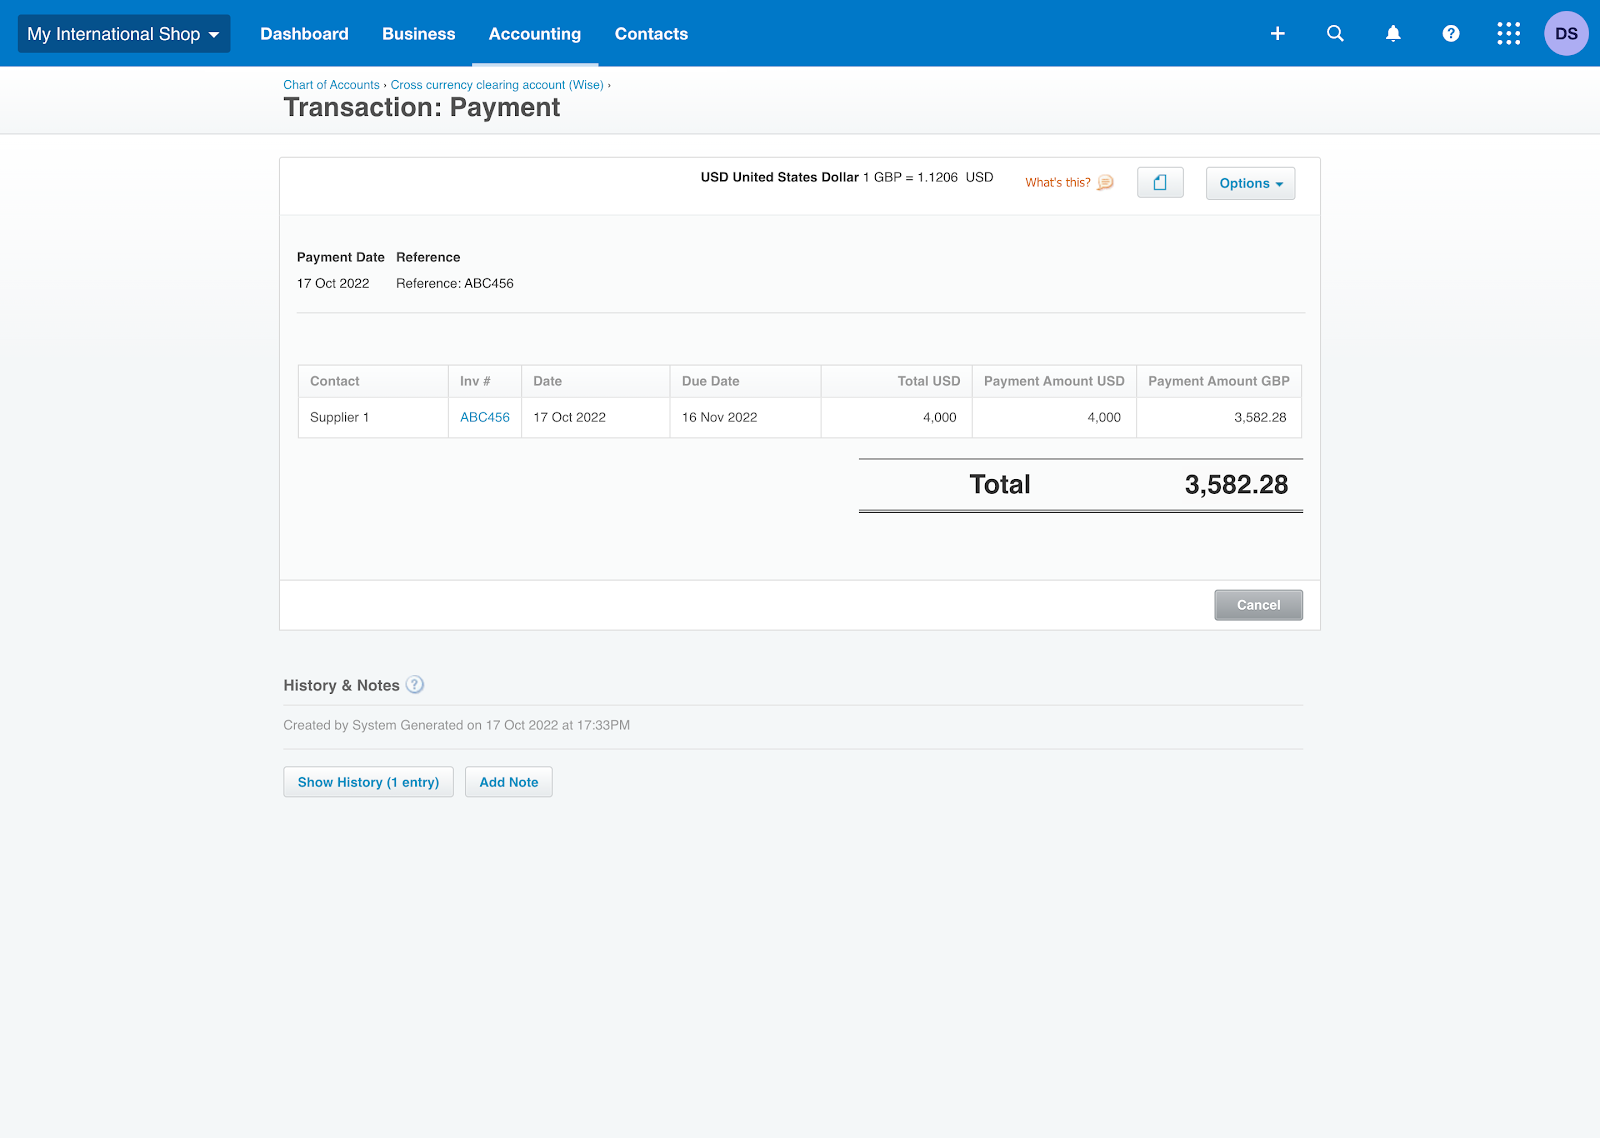
To help you keep your books tidy, all transactions that include a currency exchange will be revalued to your base currency. Note that this only applies where neither of the currencies being exchanged are your base currency. We’ll record these transactions in ‘Cross currency clearing account (Wise)’ in two parts. First, a transfer from the source currency to your Xero base currency. Second, a transfer from your Xero base currency to your target currency.
Example scenario
Your Xero base currency is GBP, and you choose to fund a USD (target) payment with your EUR (source) Wise currency account.
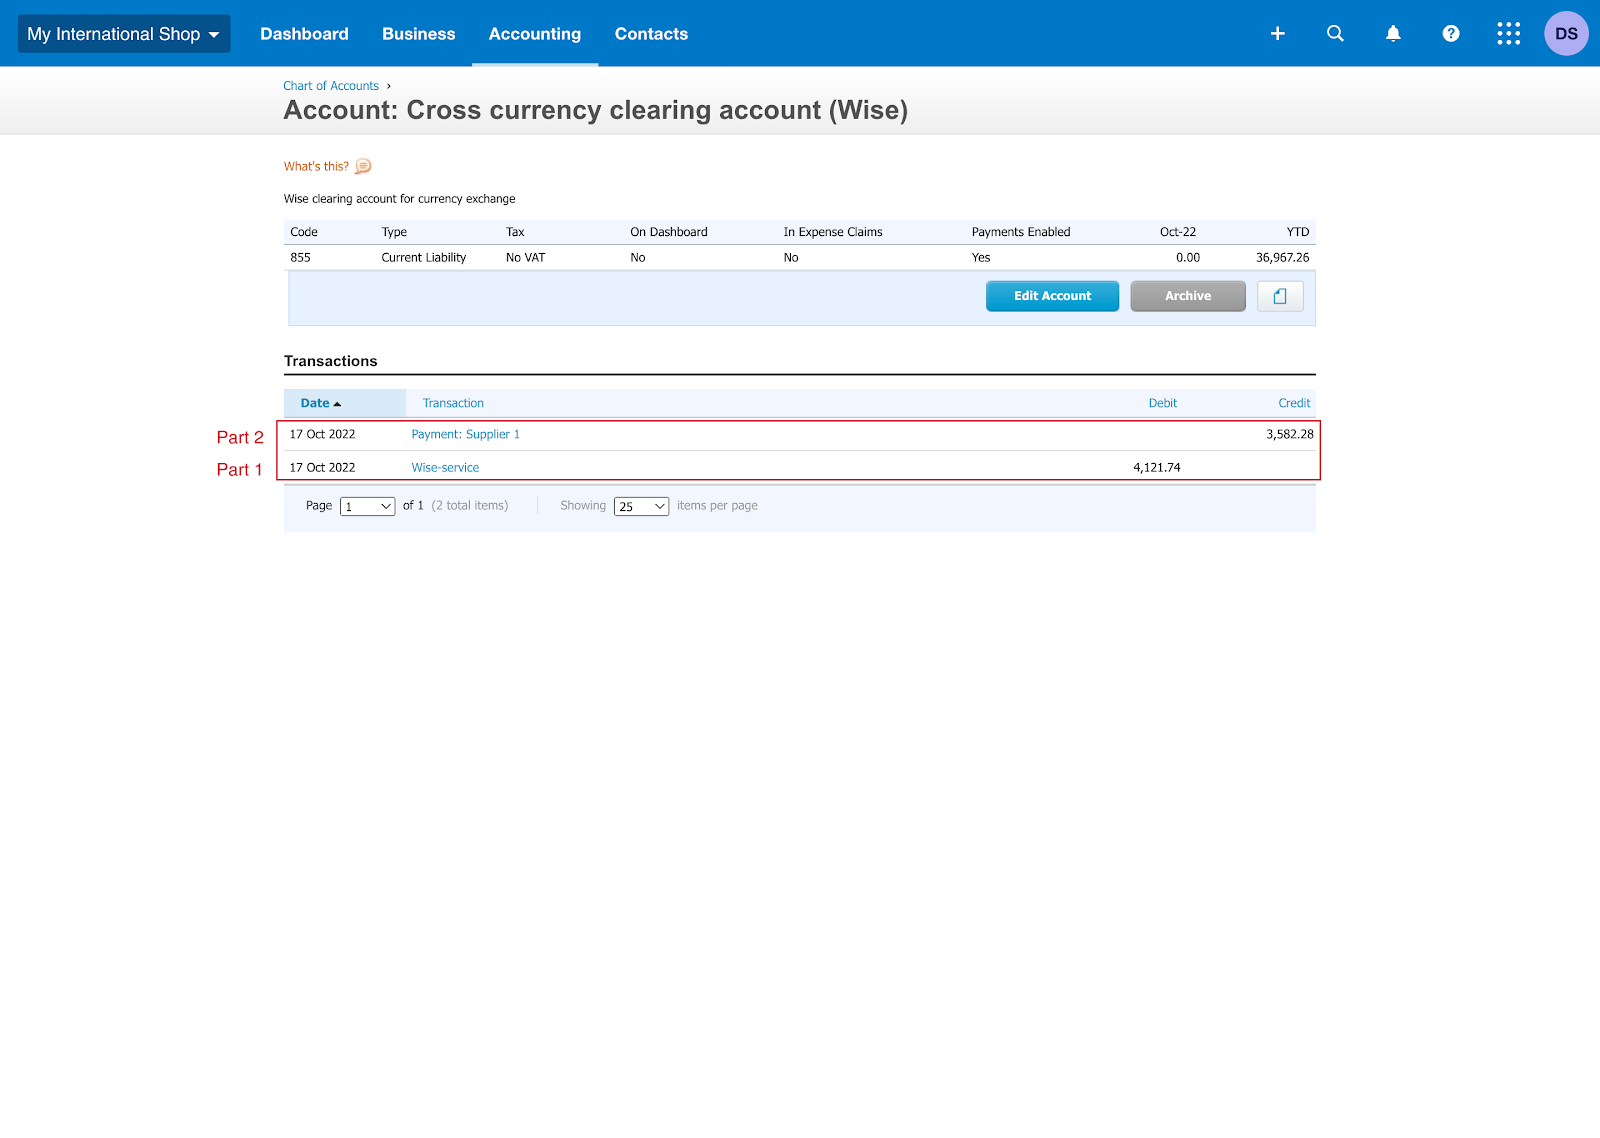
First we’ll record a EUR to GBP transfer to ‘Wise-service’ with the following reference:
“This transfer was reported using a clearing account to allow you to reconcile multiple currencies through your base currency.”
We’ll then record a GBP to USD Transfer to ‘Payment: [Supplier name]’ with a reference.
How are fees recorded?
Wise fees — including a reference — are shown as separate expense transactions to ‘Wise-service’ in the bank account that we’ll create for you, called ‘Bank charges (Wise)’. You can find them under the Chart of Accounts.