You can connect your Wise account to QuickBooks to have the bills feature, giving you the option to import your bills directly to Wise so you have better visibility.
Learn how to connect your Wise account with QuickBooks
Note, the name for your 'main account' in Wise can vary based on your location. To find the exact terminology used in your region, please check the product directly.
Import bills to Wise
You can switch on the bills feature to view your unpaid bills real-time on your Wise account. You'll then be able to pay them directly from your Bills page.
Switch on bills feature
From your Wise account, go on your business name in the top corner
In Settings, go on Connect and manage apps
Select Manage next to the QuickBooks logo
Switch on Import bills to Wise
We won't import any bills you mark as paid in QuickBooks.
If you have paid a bill through another provider, and have marked it as paid in QuickBooks, it won't appear on your Bills page in Wise.
Mark bills as 'paid' in QuickBooks
On the same page, you’ll also see an option to Automatically mark bills as paid in QuickBooks. If you switch this on, then when you pay a bill through your Bills page on Wise, we’ll automatically mark it as paid in QuickBooks. The fees will be recorded as "Bank Charges".
To pay unpaid bills:
Navigate to the Bills tab on your Wise account
If your bills are already synced, you'll see a list of unpaid bills from QuickBooks. These will be synced automatically.
From the Bills tab, you can pay the bill as you would normally send money through Wise
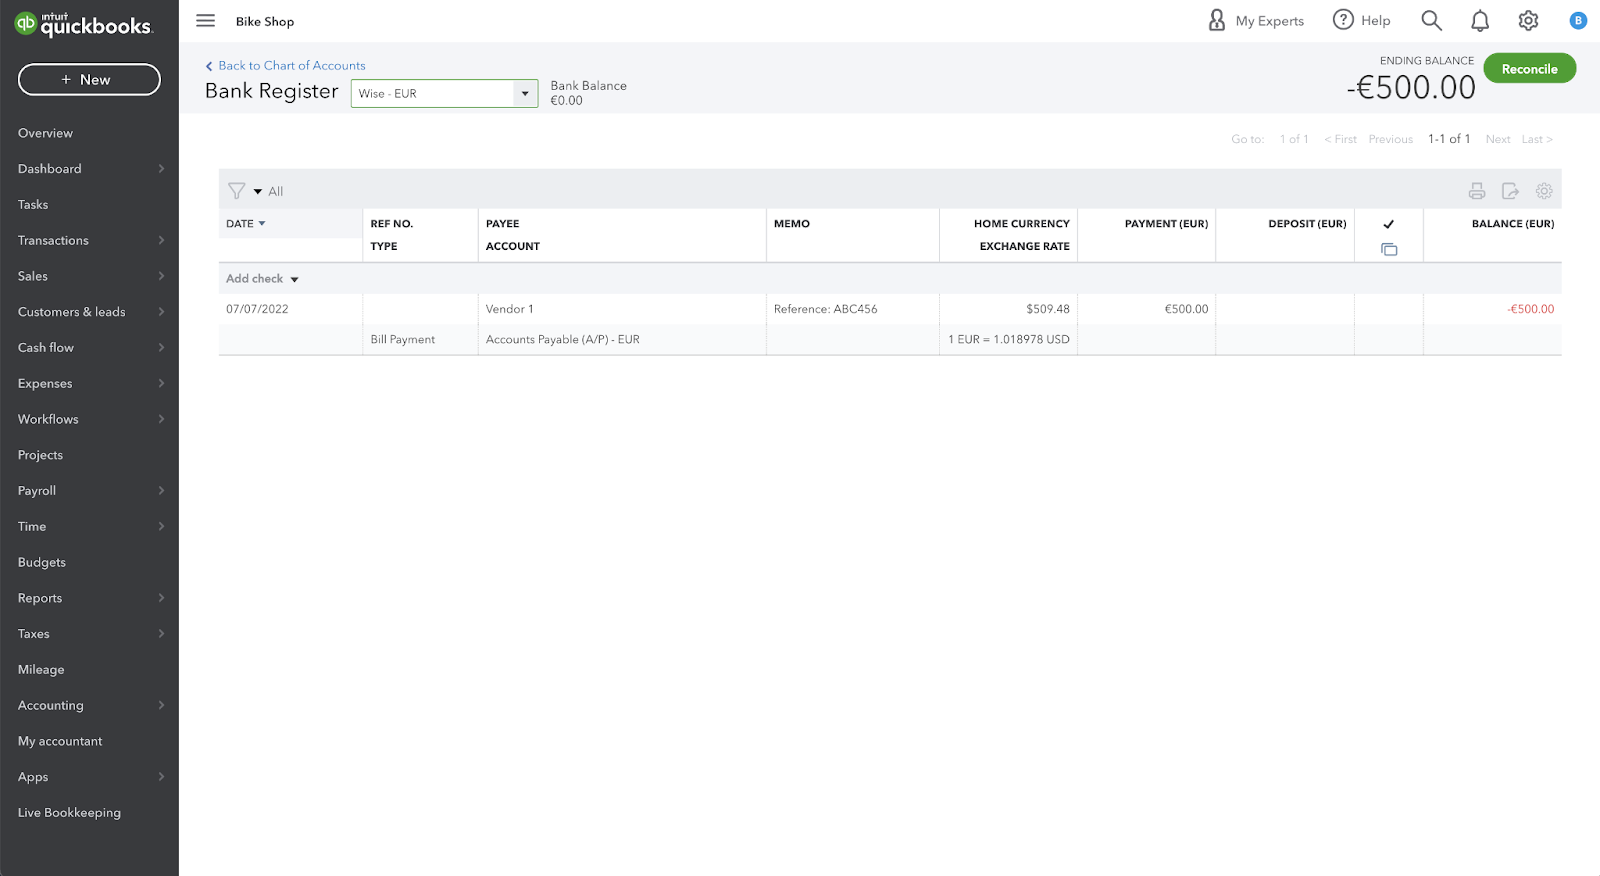
Example bill payment
In this example, your bill ‘ABC456’ in the amount of €500 has been paid to ‘Vendor 1’ using the Bill pay feature on Wise, and you funded the bill with your Wise EUR.
Because you connected your Wise EUR to your QBO bank register named ‘Wise - EUR’, the bill payment transaction gets recorded in that register.
You’ll see a ‘Bill Payment (Check)’ in your Expenses with the amount.
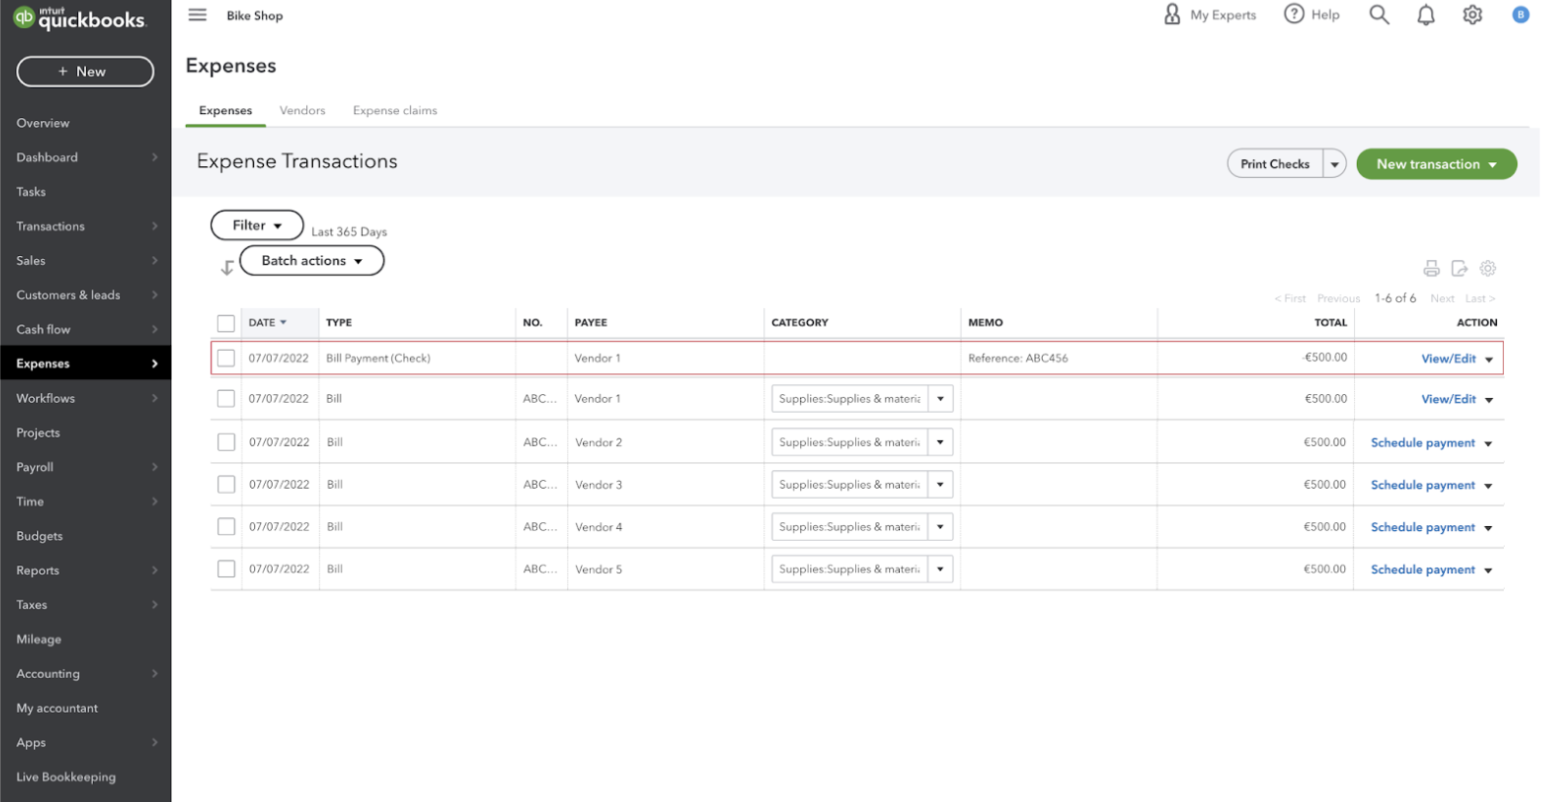
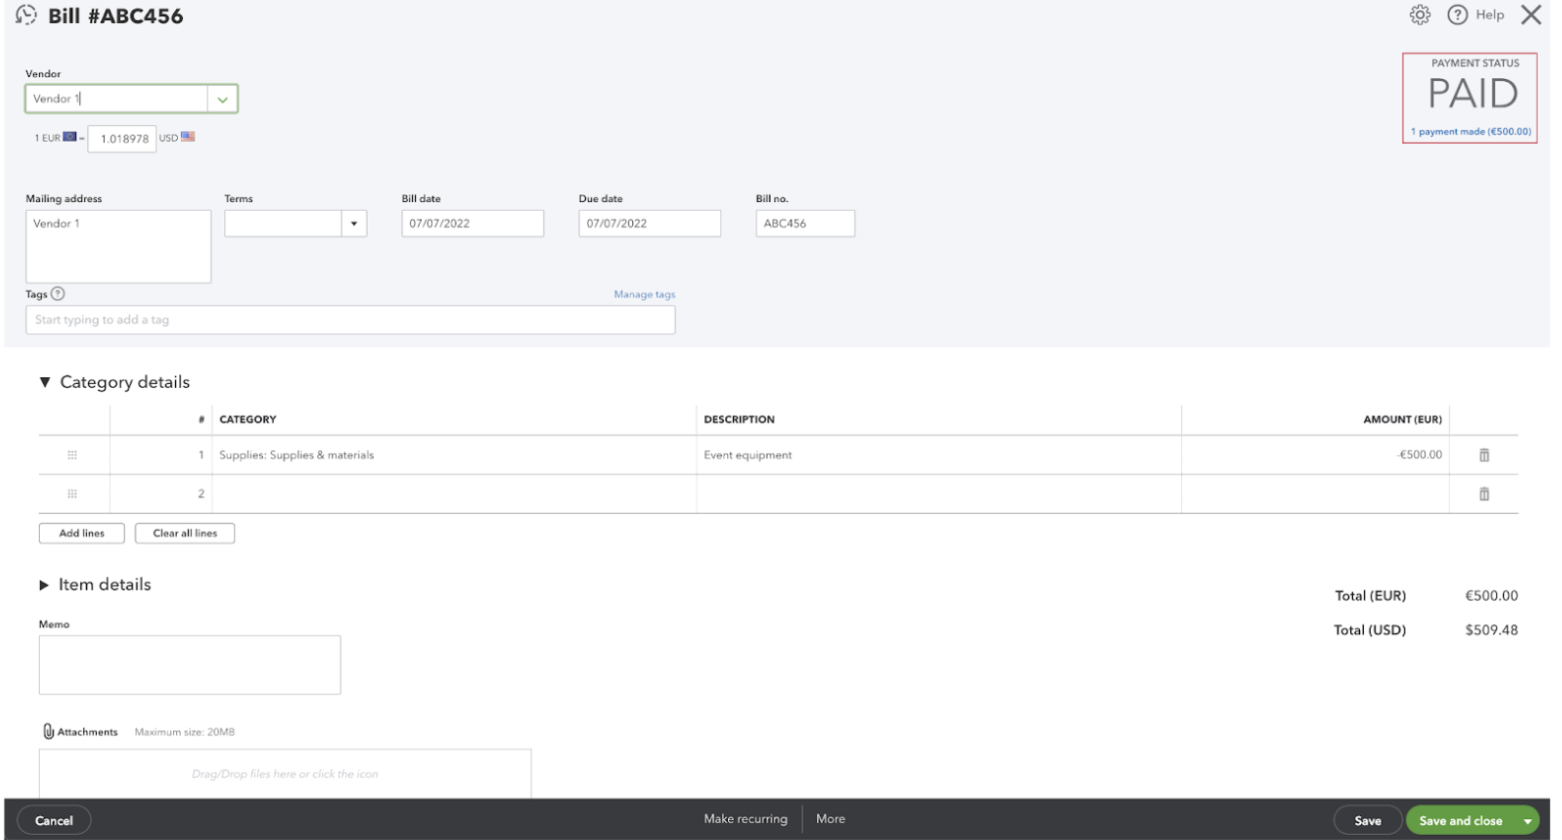
And your ‘ABC456’ Bill will be marked as paid.
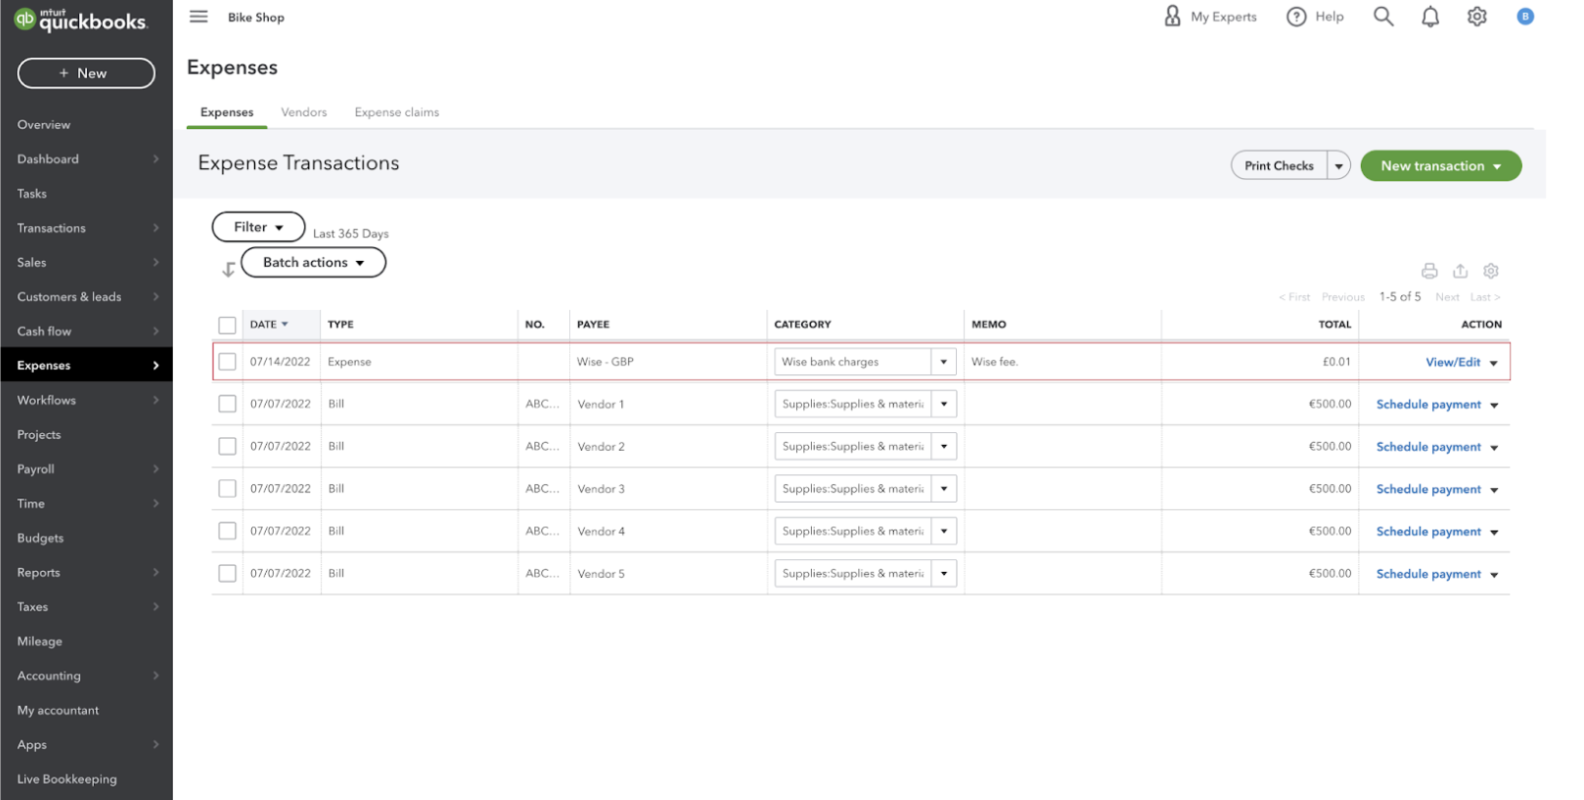
What if there’s a fee associated with my payment?
Any Wise fee will be entered automatically as a separate Expense transaction with the category ‘Wise bank charges’ and a Memo ‘Wise fee’.
Why am I seeing a clearing account? What is this?
A clearing account will be automatically created for one of these reasons:
If you choose an external payment method, we can't always retrieve information about the bank account funding the payment, for example a non-Wise card or bank payment. This applies for both incoming and outgoing payments.
QuickBooks requires all transactions that include a currency exchange to be converted to your Home currency to help you keep your books tidy.
For example, if your home currency is USD and you choose to fund a GBP bill payment with your EUR Wise account, QuickBooks still requires us to record the transaction in USD. This means we’ll record a EUR to USD Transfer in addition to a USD to GBP Expense in your ‘Wise clearing from USD’ Bank Register including a Memo describing this.
Learn more about QuickBooks home currency adjustments.
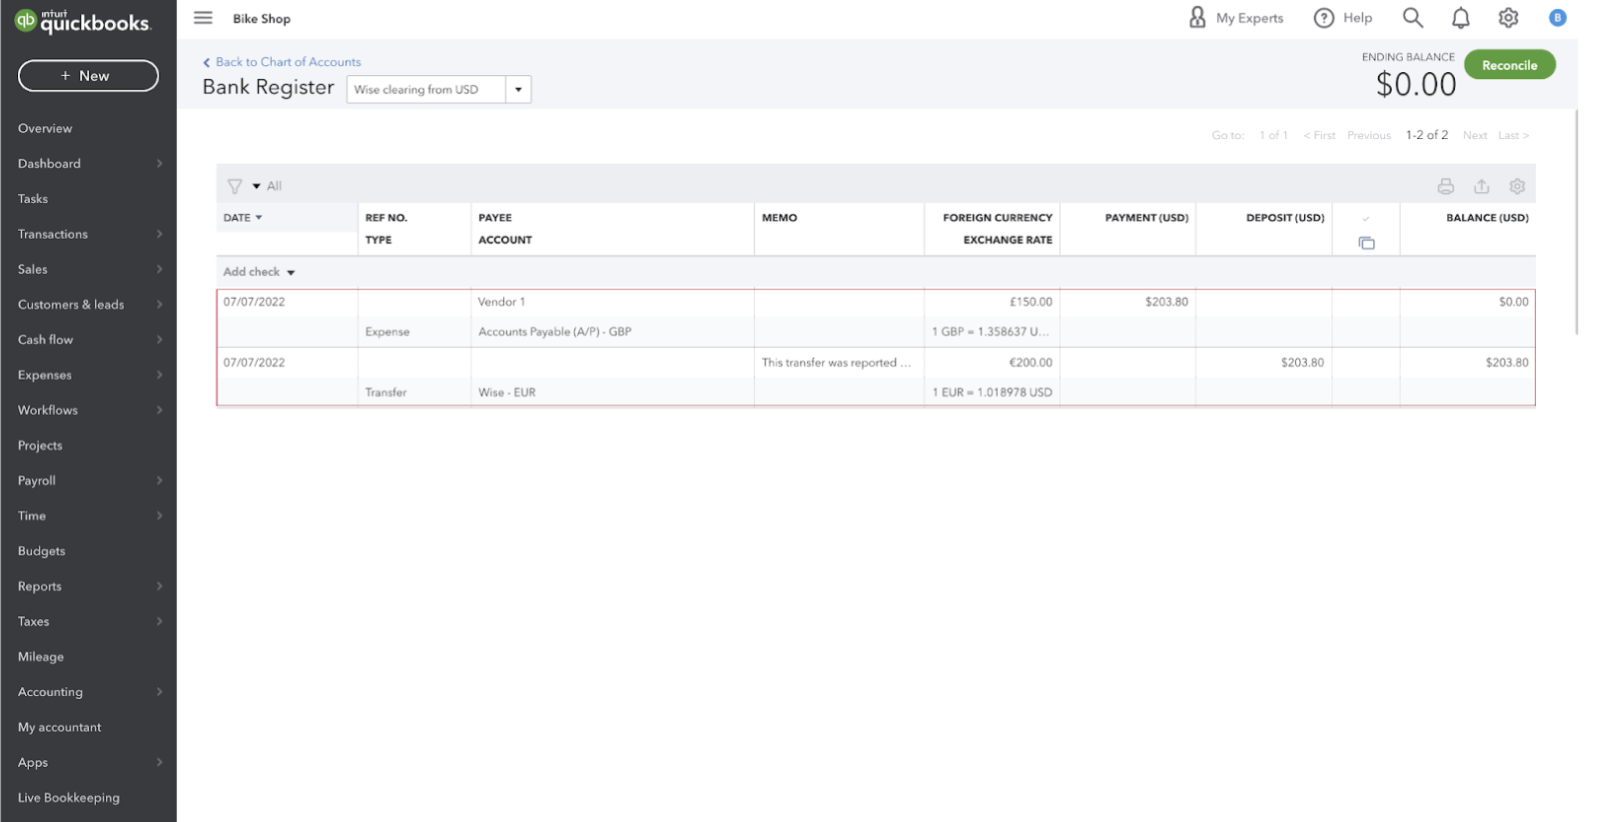
In each of these instances, we’ll record the transaction in a ‘Wise clearing from [currency]’ or ‘Wise clearing to [currency]’ Bank Register depending on whether it was an incoming or outgoing conversion.